Alignment Sticks Golf: How to Use Them to Improve Your Aim and Swing
You can have a solid golf swing and still watch the ball start in the wrong direction. Sometimes the problem isn’t your swing at all. Your feet may be aimed too far left, your shoulders may be slightly open, or your clubface may not be pointing where you think it is.
That’s where alignment sticks golf training can make a real difference.
Golf alignment sticks are among the simplest training aids you can put in your bag. They don’t have complicated settings, batteries, or moving parts. You simply place them on the ground, use them as visual references, and start seeing what your setup and swing are actually doing.
The biggest benefit is feedback. Instead of guessing whether you’re aimed correctly, you can create a physical reference that shows you the target line.
Whether you’re a beginner trying to build good fundamentals or an experienced golfer working on swing consistency, learning how to use alignment sticks in golf can make your practice sessions much more productive.
Table of Contents
What Are Alignment Sticks in Golf?
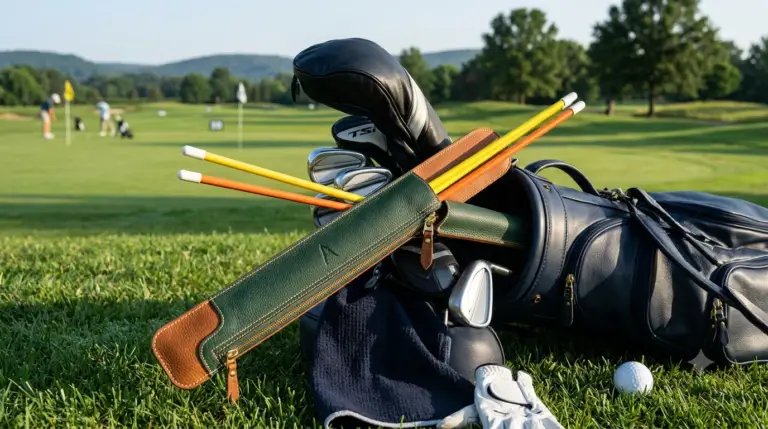
Golf alignment sticks are long, lightweight rods designed to help you develop better awareness of your alignment, setup and swing.
You will usually see them sold in pairs. Most are brightly colored so they’re easy to see against grass or a driving-range surface.
Although they look simple, you can use them for much more than aiming your feet.
What Do Golf Alignment Sticks Look Like?
A typical alignment stick is:
- Long and thin.
- Lightweight and easy to carry.
- Highly visible.
- Designed to sit on the ground or be inserted into turf.
- Usually sold as a pair.
Their simple design is actually one of their strengths. You can change their position depending on what you want to practice.
What Are Alignment Sticks Used For?
You can use alignment sticks to work on:
- Target alignment.
- Clubface alignment.
- Foot and shoulder alignment.
- Ball position.
- Swing path awareness.
- Takeaway mechanics.
- Swing-plane awareness.
- Putting alignment.
- Setup consistency.
Instead of relying entirely on feel, you get an external reference that allows you to see what’s happening.
Why Alignment Matters So Much in Golf
Your clubface can be perfectly struck and your swing can feel smooth, but if you’re starting from a poor alignment position, your result may still be disappointing.
Think about what happens when you aim slightly away from your intended target. Your body may naturally compensate during the swing because you’re trying to send the ball toward where you actually want it to go.
That compensation can create inconsistency.
Clubface Alignment vs. Body Alignment
There are two important parts of alignment to understand.
Clubface alignment refers to where the face of your club is pointing at address.
Body alignment refers to the relationship between your:
- Feet
- Knees
- Hips
- Shoulders
Your body doesn’t necessarily need to point directly at the target. In a normal setup, your body lines generally work parallel to the target line.
This is one reason alignment sticks are useful: they give you a physical representation of those lines.
How Poor Alignment Can Affect Your Ball Flight
Poor alignment can contribute to shots that finish away from your intended target.
| Alignment Problem | Possible Result | What to Check |
|---|---|---|
| Clubface aimed right | Push or fade | Clubface |
| Clubface aimed left | Pull or draw | Clubface |
| Feet aimed left | Altered swing path | Feet |
| Shoulders misaligned | Swing compensation | Shoulders |
| Ball positioned inconsistently | Variable contact | Ball position |
Alignment isn’t the only factor responsible for these shots. Grip, clubface control, swing path, impact conditions and other factors all matter. However, better alignment gives you a more reliable starting point.
How to Set Up Golf Alignment Sticks Correctly
Before you start using alignment stick drills, learn how to position them properly.
The Basic Parallel Alignment Setup
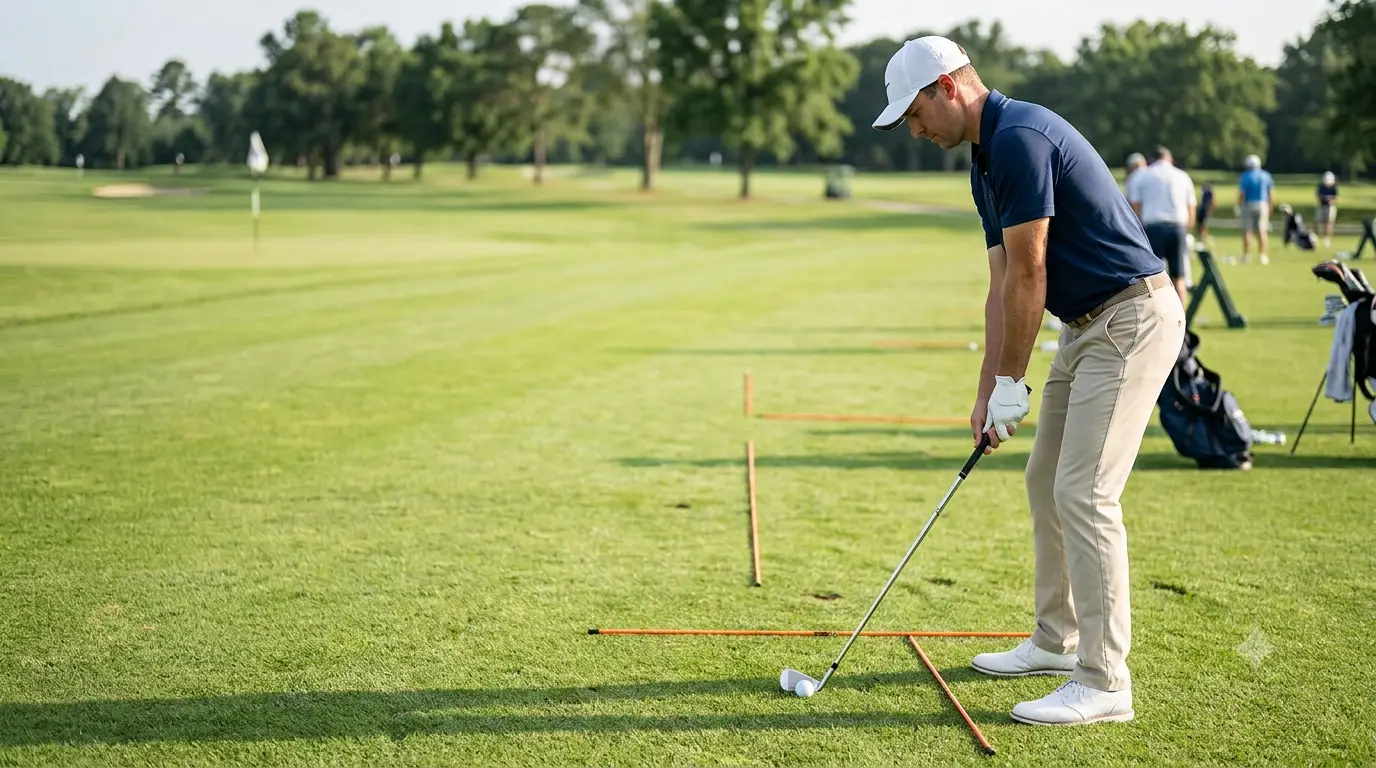
For a simple alignment drill:
- Choose a target on the driving range.
- Place one alignment stick on the ground pointing toward your target.
- Position your golf ball next to the stick.
- Place the second stick parallel to the first.
- Stand beside the second stick.
- Check your feet, hips and shoulders.
- Place your clubface behind the ball and make sure it is aimed at the target.
The first stick represents your target line.
The second stick gives you a reference for your body alignment.
Once you set this up, you’ll often discover that what feels “square” isn’t actually square.
The Correct Distance Between the Sticks
You don’t need an exact measurement for every drill.
Give yourself enough room to stand naturally while keeping the alignment reference visible. The ideal spacing will depend on your stance width, the club you’re using and the specific exercise.
The important thing is that the sticks help you create a clear visual reference without interfering with your normal setup.
A Simple Alignment Check
Try this exercise:
- Pick a specific target.
- Address the ball without looking at the alignment sticks.
- Set your clubface and body as you normally would.
- Step away.
- Compare your setup with the sticks.
- Notice where your perception differs from reality.
This simple exercise can be surprisingly revealing.
7 Alignment Sticks Golf Drills to Improve Your Game
Once you understand the basic setup, you can start using alignment stick drills to work on different parts of your game.
1. Basic Aim and Alignment Drill
This is the best place to start if you’ve never used alignment sticks before.
Goal: Improve your ability to aim the clubface and body consistently.
Set one stick toward the target and another parallel to it.
Then:
- Place the ball beside the target-line stick.
- Set your clubface behind the ball.
- Align your feet with the second stick.
- Check your hips and shoulders.
- Hit several shots.
- Repeat the setup before each shot.
Don’t rush this process.
You’re training yourself to recognize what proper alignment looks and feels like.
Over time, you want to become less dependent on the physical stick and more capable of reproducing the same alignment yourself.
2. Swing Path Drill
Goal: Develop awareness of your club’s path.
Swing path is one of the more complicated aspects of golf, so don’t try to completely rebuild your swing with an alignment stick.
Instead, use the stick as a visual reference.
You can place an alignment stick on the ground along your target line and use another to create a visual guide for your practice swings.
Start with slow swings.
Then progress to:
- Half swings.
- Three-quarter swings.
- Normal swings.
The goal isn’t to force your club into a perfect-looking position. You’re creating awareness of how your club moves in relation to the target line.
3. Takeaway Drill
Your takeaway influences the rest of your backswing, so it’s worth practicing deliberately.
Place an alignment stick on the ground along your target line.
Then make slow takeaways while watching how the clubhead moves away from the ball.
You can use the stick to give yourself a visual reference and identify exaggerated movements.
Practice several slow repetitions before hitting a ball.
A useful progression is:
Slow rehearsal → Half swing → Full swing
This helps you transfer the movement from a controlled drill into your normal swing.
4. Ball Position Drill
Ball position is easy to overlook.
If you continually place the ball in a different position, you’re changing the conditions under which you’re hitting the shot.
Use an alignment stick to create a consistent reference for your stance and ball position.
As a general starting point:
| Club | General Ball Position |
|---|---|
| Short irons | Around the center |
| Mid irons | Slightly forward of center |
| Long irons | Further forward |
| Driver | Forward in the stance |
These are general guidelines rather than universal rules. Your stance width, swing style, club design and coaching philosophy can influence the ideal position.
The important thing is consistency.
5. Posture and Setup Drill
Good alignment begins before you move the club.
Use the alignment sticks to establish a reference line while checking your:
- Stance width.
- Knee flex.
- Spine angle.
- Distance from the ball.
- Shoulder position.
- Ball position.
You can then repeat the same setup several times.
This is particularly useful if your setup tends to change from one club to another.
6. Swing Plane Drill
Alignment sticks can also help you develop awareness of the swing plane.
One option is to position a stick at an angle as a visual reference while practicing slow swings.
The stick should not become something you try to hit. It is simply a reference.
Practice slowly and pay attention to how the club moves relative to the stick.
Because swing plane is highly individual, avoid trying to copy an arbitrary position just because it looks good. The purpose of the exercise is to improve awareness and consistency.
7. Putting Alignment Drill
Don’t leave your alignment sticks in the bag when you move to the putting green.
Putting is heavily dependent on starting the ball on your intended line, so alignment practice can be extremely useful.
Place an alignment stick on the ground along your intended starting line.
Then:
- Set the ball beside the line.
- Position your putter face.
- Align your body.
- Make a controlled stroke.
- Watch where the ball starts.
- Repeat.
You can also use two sticks to create a visual corridor for your putter or ball.
This gives you immediate feedback about your setup and start line.
Alignment Sticks Golf Drills for Different Skill Levels
Not every golfer needs the same drills.
Beginners
If you’re learning the fundamentals, concentrate on:
- Basic aim.
- Setup.
- Ball position.
- Putting alignment.
Your priority should be building repeatable habits rather than trying to fix everything at once.
Intermediate Golfers
Once your setup becomes more consistent, introduce:
- Swing-path drills.
- Takeaway exercises.
- Swing-plane awareness.
- More target-based practice.
You can use the sticks for short technical sessions before moving into normal shot practice.
Advanced Golfers
More experienced golfers can use alignment sticks for:
- Start-line control.
- Shot shaping.
- Swing-path awareness.
- Clubface control.
- Pre-shot routine development.
At this level, the sticks are often most valuable as a diagnostic tool rather than something you use throughout an entire practice session.
| Skill Level | Best Alignment Stick Drills | Main Goal |
|---|---|---|
| Beginner | Aim, setup, ball position | Consistency |
| Intermediate | Path, takeaway, plane | Swing awareness |
| Advanced | Start line, shot shaping | Precision |
How to Use Alignment Sticks at the Driving Range
One of the easiest ways to get value from your alignment sticks is to give your range session some structure.
10-Minute Alignment Sticks Practice Routine
Minutes 1–2: Setup
Check your stance, ball position and target alignment.
Minutes 3–5: Half swings
Focus on your takeaway and swing path.
Minutes 6–8: Full shots
Remove some of the technical focus and hit normal shots toward specific targets.
Minutes 9–10: Test yourself
Take away the sticks and see whether you can reproduce the same alignment independently.
This last step matters.
You aren’t practicing with alignment sticks so that you can become dependent on them. You’re using them to improve your own awareness.
20-Minute Practice Routine
If you have more time:
- Warm up with short swings.
- Check your alignment.
- Practice ball position.
- Work on your takeaway.
- Hit half swings.
- Hit full shots.
- Change targets.
- Finish without the sticks.
Changing targets is especially important because it prevents you from simply memorizing one setup.
Common Mistakes When Using Golf Alignment Sticks
Alignment sticks are simple, but you can still use them incorrectly.
Using the Sticks Without a Specific Goal
Don’t place two sticks on the ground just because you own them.
Know what you’re trying to improve.
For example:
- Poor aim → alignment drill.
- Inconsistent ball position → ball-position drill.
- Swing-path awareness → path drill.
- Putting start line → putting drill.
Becoming Too Dependent on Alignment Sticks
The goal is not to need alignment sticks for every shot.
Use them to develop your internal reference system.
After a few repetitions, remove the sticks and test yourself.
Practicing Too Fast
Technical practice usually benefits from slower repetitions.
If you’re trying to learn something new, start with controlled movements before increasing speed.
Ignoring the Target
Alignment only makes sense in relation to a target.
Always choose a specific target rather than simply pointing the stick toward an arbitrary direction.
Using Too Many Sticks
More equipment doesn’t automatically mean better practice.
For many drills, one or two sticks are enough.
Keep the exercise simple enough that you understand exactly what you’re trying to accomplish.
Alignment Sticks vs. Other Golf Training Aids
Alignment sticks are particularly useful because they can serve several purposes.
| Training Aid | Best For | Main Advantage |
|---|---|---|
| Alignment sticks | Aim and swing awareness | Versatile |
| Putting gate | Putting start line | Immediate feedback |
| Impact bag | Impact position | Feedback on impact feel |
| Swing-plane trainer | Swing-plane awareness | Visual reference |
| Mirror | Setup | Visual confirmation |
The advantage of alignment sticks is versatility.
One simple training aid can help you work on your full swing, short game, putting and setup.
Can You Use Regular Sticks Instead of Golf Alignment Sticks?
Technically, you can create some alignment references using other straight objects, including golf clubs.
However, purpose-built alignment sticks are easier to see, carry and position.
They are also designed specifically for training.
If you’re improvising, prioritize safety. Never use an object that could create a hazard if your club strikes it.
How Often Should You Practice With Alignment Sticks?
You don’t need to spend an hour every day using alignment sticks.
Consistency is more important than marathon practice sessions.
A simple approach could be:
- Beginner: 2–3 short sessions per week.
- Intermediate: Include alignment work in regular range sessions.
- Advanced: Use sticks during targeted technical practice.
You can also spend just five minutes checking alignment before a normal practice session.
The objective is to build better habits without allowing technical drills to take over your entire practice routine.
How Alignment Sticks Can Help With Common Golf Problems
Alignment sticks can provide useful feedback when you’re dealing with certain recurring problems.
| Golf Problem | Useful Alignment Stick Drill |
|---|---|
| Pulls | Alignment and clubface check |
| Pushes | Target-line drill |
| Slice | Alignment and path awareness |
| Hook | Alignment and clubface awareness |
| Inconsistent contact | Ball-position drill |
| Poor setup | Posture drill |
| Inconsistent putting | Putting alignment drill |
Remember that an alignment stick isn’t a magic cure.
If you have a persistent slice, hook or contact problem, the underlying cause could involve several swing and equipment factors. Alignment drills are best viewed as one part of your practice routine.
A Simple Alignment Sticks Golf Practice Plan
If you want a straightforward weekly routine, try dividing your practice into three sessions.
Day 1 – Aim and Setup
Focus on:
- Target alignment.
- Clubface position.
- Ball position.
- Posture.
Spend more time checking your setup than hitting balls.
Day 2 – Swing Path
Work on:
- Takeaway.
- Half swings.
- Swing-path awareness.
- Gradual transition into full swings.
Keep the movements controlled.
Day 3 – Transfer to the Course
This is where you test whether the practice is working.
Start with the alignment sticks, then remove them.
Pick different targets and go through your normal pre-shot routine.
Try to reproduce the alignment you practiced without using the physical reference.
Track Your Progress
Instead of judging your session only by how many good shots you hit, keep an eye on:
- Starting direction.
- Ball flight.
- Strike quality.
- Setup consistency.
- Alignment errors.
- Confidence over the ball.
You may discover that your biggest improvement isn’t a dramatic swing change. It may simply be that you’re starting each shot from a more reliable position.
FAQ About Alignment Sticks Golf
What are alignment sticks used for in golf?
Golf alignment sticks are used to create visual references for aim, body alignment, ball position, swing path, takeaway, swing-plane awareness and putting.
Are golf alignment sticks worth it?
For many golfers, yes. They’re relatively simple training aids that can be used for numerous drills. Their value comes from the feedback they provide rather than from the sticks themselves.
Can alignment sticks improve your golf swing?
They can help you become more aware of your setup, alignment and swing movement. However, they don’t automatically correct a swing fault. Consistent practice and appropriate instruction may still be necessary.
How do you use alignment sticks to fix a slice?
You can begin by checking your target alignment and clubface position, then use controlled drills to develop awareness of your swing path. A slice can have multiple causes, so alignment sticks should be treated as a training aid rather than a guaranteed solution.
How do you use alignment sticks for putting?
Place a stick along your intended putting line and use it to check your putter face, body position and start line. You can also create a corridor for the ball or putter during practice.
How many alignment sticks should a golfer use?
Two sticks are enough for many common drills. Some exercises only require one. You don’t need a large collection of training aids to get started.
Can beginners use golf alignment sticks?
Absolutely. Beginners can benefit from simple alignment, setup and ball-position drills because these exercises help establish consistent fundamentals.
Can you use alignment sticks at home?
Yes, provided you have enough space and use them safely. Setup checks and slow practice movements can be performed indoors, but avoid any exercise that could cause the club or stick to strike a person, wall or valuable object.
Conclusion: Make Alignment Sticks Part of Your Practice Routine
You don’t need an expensive launch monitor or a complicated collection of training aids to make your practice more purposeful.
Alignment sticks golf training gives you something extremely useful: a clear visual reference.
You can use that reference to check where you’re aiming, where you’re standing, where the ball is positioned and how your swing relates to the target line.
Start with the basics. Spend a few minutes checking your alignment, then move into simple drills such as the takeaway, ball-position and swing-path exercises. Once you’ve practiced the movement, remove the sticks and see whether you can reproduce it naturally.
That’s where the real improvement begins.
Your next range session doesn’t have to be longer. It just needs to be more deliberate.
Grab your alignment sticks, choose a target and try one drill at a time. You may be surprised by how much you can learn simply by seeing what your setup is actually doing.
Post Reviews
There are no reviews yet. Be the first one to write one.